NextCloud
![]()
Presentation
NextCloud is a fork of Owncloud, suite of client-server software for creating file hosting services and using them.
This documentation explains how to interconnect LemonLDAP::NG and NextCloud using SAML 2.0 protocol.
Pre-requisites
NextCloud
You need to install the software.
Tip
If your NextCloud is behind a proxy (thus having a private IP), metadata generated by NextCloud won’t work.
Consider changing the configuration of NextCloud to force the domain and the protocol, in $nextcloudrootwww/config/config.php, add the following:
'overwritehost' => 'nextcloud.example.com',
'overwriteprotocol' => 'https',
You also need to enable the “SAML authentication” plugin in your NextCloud. <code> + Apps -> Not enabled -> SAML authentication</code>
LL:NG
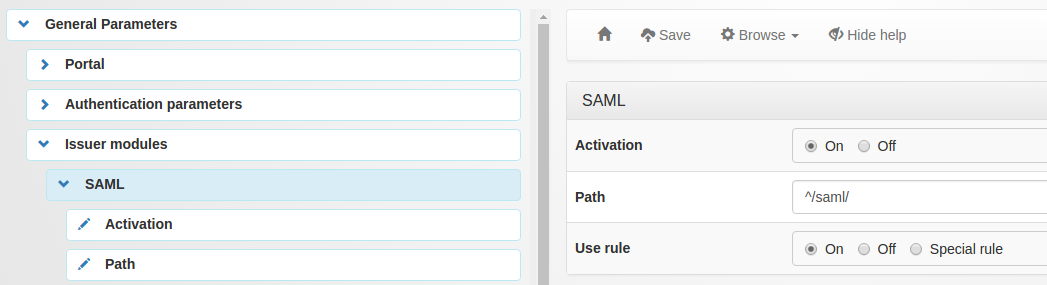
You need to enable SAML 2.0 issuer module in LL:NG:
"General Parameters -> Issuer modules -> SAML -> Activation"
NextCloud, SAML 2.0 configuration
Configuration of SAML 2.0 in NextCloud is pretty straightforward.
Administration -> SAML authentication
You will find the following fields:
Attribute to map the UID to: Identity attribute provided by your LL:NG that will be used as UID in NextCloud.
Identity Provider Data:
Identifier of the IdP entity: SAML Metadata URL of your LL:NG
URL Target of the IdP where the SP will send the Authentication Request Message: SingleSignOn URL of your LL:NG
URL Location of the IdP where the SP will send the SLO Request: SingleLogOut URL of your LL:NG
Public X.509 certificate of the IdP: Certificate of your LL:NG (see below for instructions)
We need a few steps to generate our LL:NG certificate (unless you already have one). You first need to create a pair of SSH Keys in LL:NG:
SAML 2 Service -> Security Parameters -> Signature
and click “New keys” 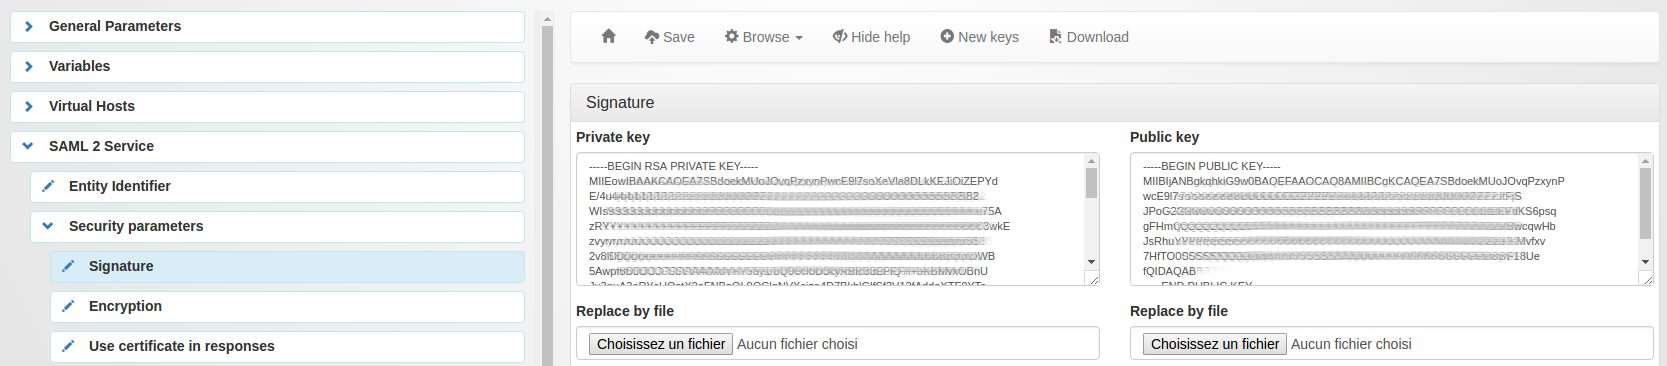
Take the private key in a private.key file, and run the following:
openssl req -new -key private.key -out cert.csr
openssl x509 -req -days 3650 -in cert.csr -signkey private.key -out cert.pem
Copy/Paste the content of your new cert.pem in the “Public X.509 certificate of the IdP” field of your NextCloud.
Your fields should look like this: 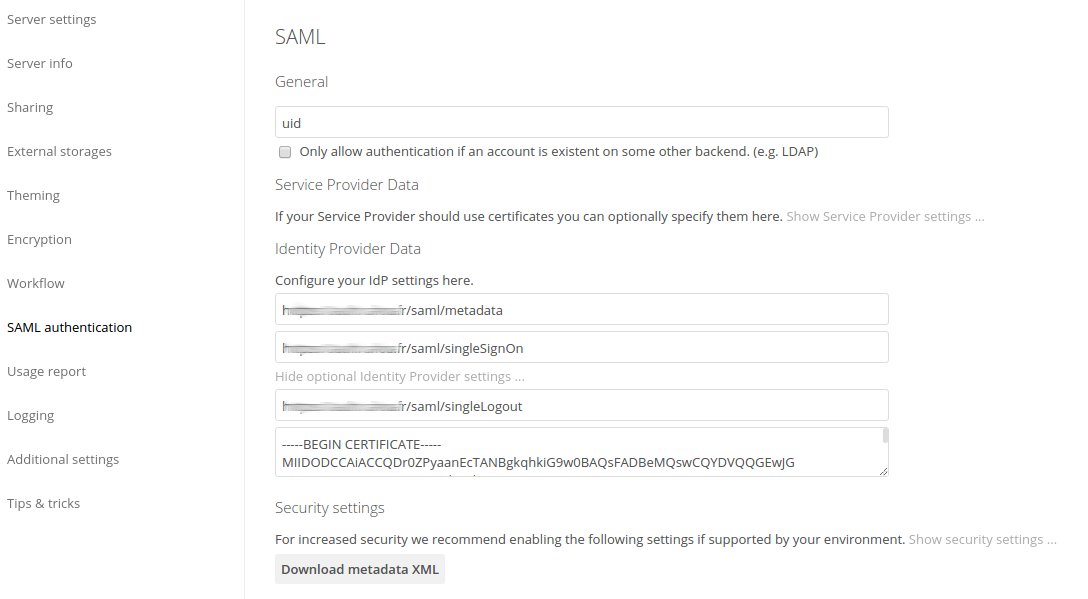
You can now download your metadata xml file.
LL:NG, SAML 2.0 Service Provider configuration
We now have to define a service provider (e.g our nextcloud) in LL:NG.
Go to “SAML service providers”, click on “Add SAML SP” and name it as you want (example : ‘NextCloud’)
In the new subtree ‘NextCloud’, open ‘Metadata’ and paste the content of your previously downloaded file (or upload the file)
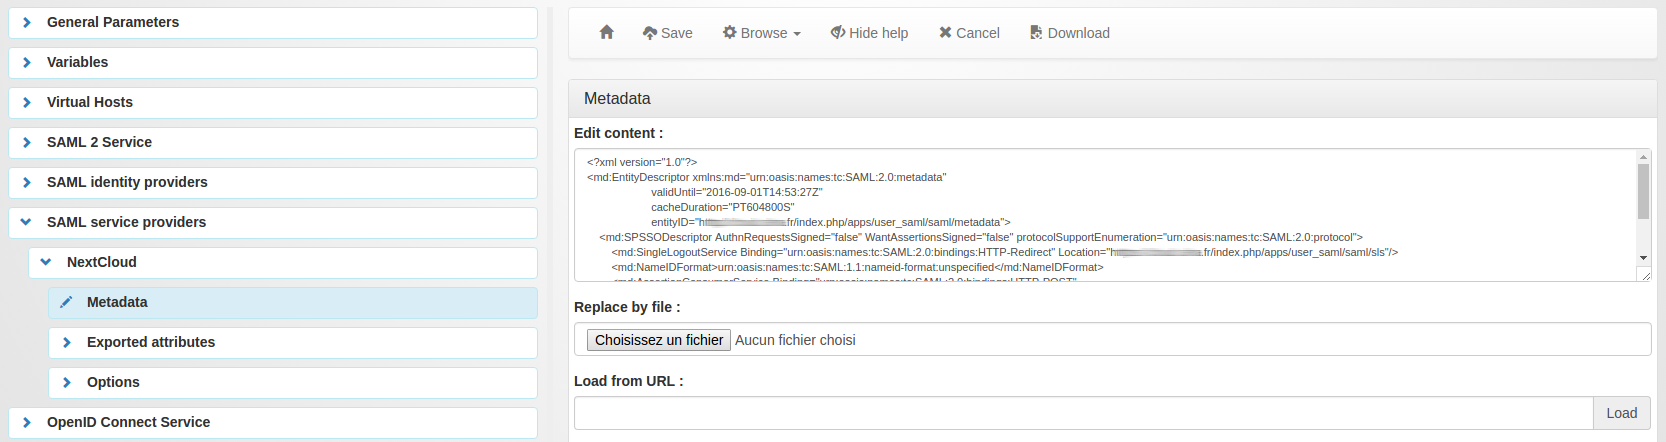
Now go in “Exported attributes” and add, at least, the ‘uid’

Don’t forget to save your configuration.
You are now good to go, and you can add the application in your menu and your virtual hosts.